2 Alternatives To Photoshop I Can’t Live Without

Living on a college budget means my access to software like Photoshop and Illustrator is limited to finding an open computer in the library, or getting someone to let me use the free trial on their computer (it was totally worth it). Paying full price for either is out of the question, and with no form of income yet, I don’t want to jump into a year-long contract at $20 a month. My solution? Well, there’s a free version of everything, right?

While searching for a free alternative, I had a few requirements in mind:

  • Ability to use my own fonts
  • Unlimited use (no limit to the amount of graphics I can make before being forced to upgrade)
  • A snap-to-grid function
  • A feature for adding shapes/lines/other graphics
  • Easy to use, not glitchy

After reviewing several free programs, I ended up with two strong fits: PicMonkey and Canva.

2 Alternatives To Photoshop I Can't Live Without

PicMonkey

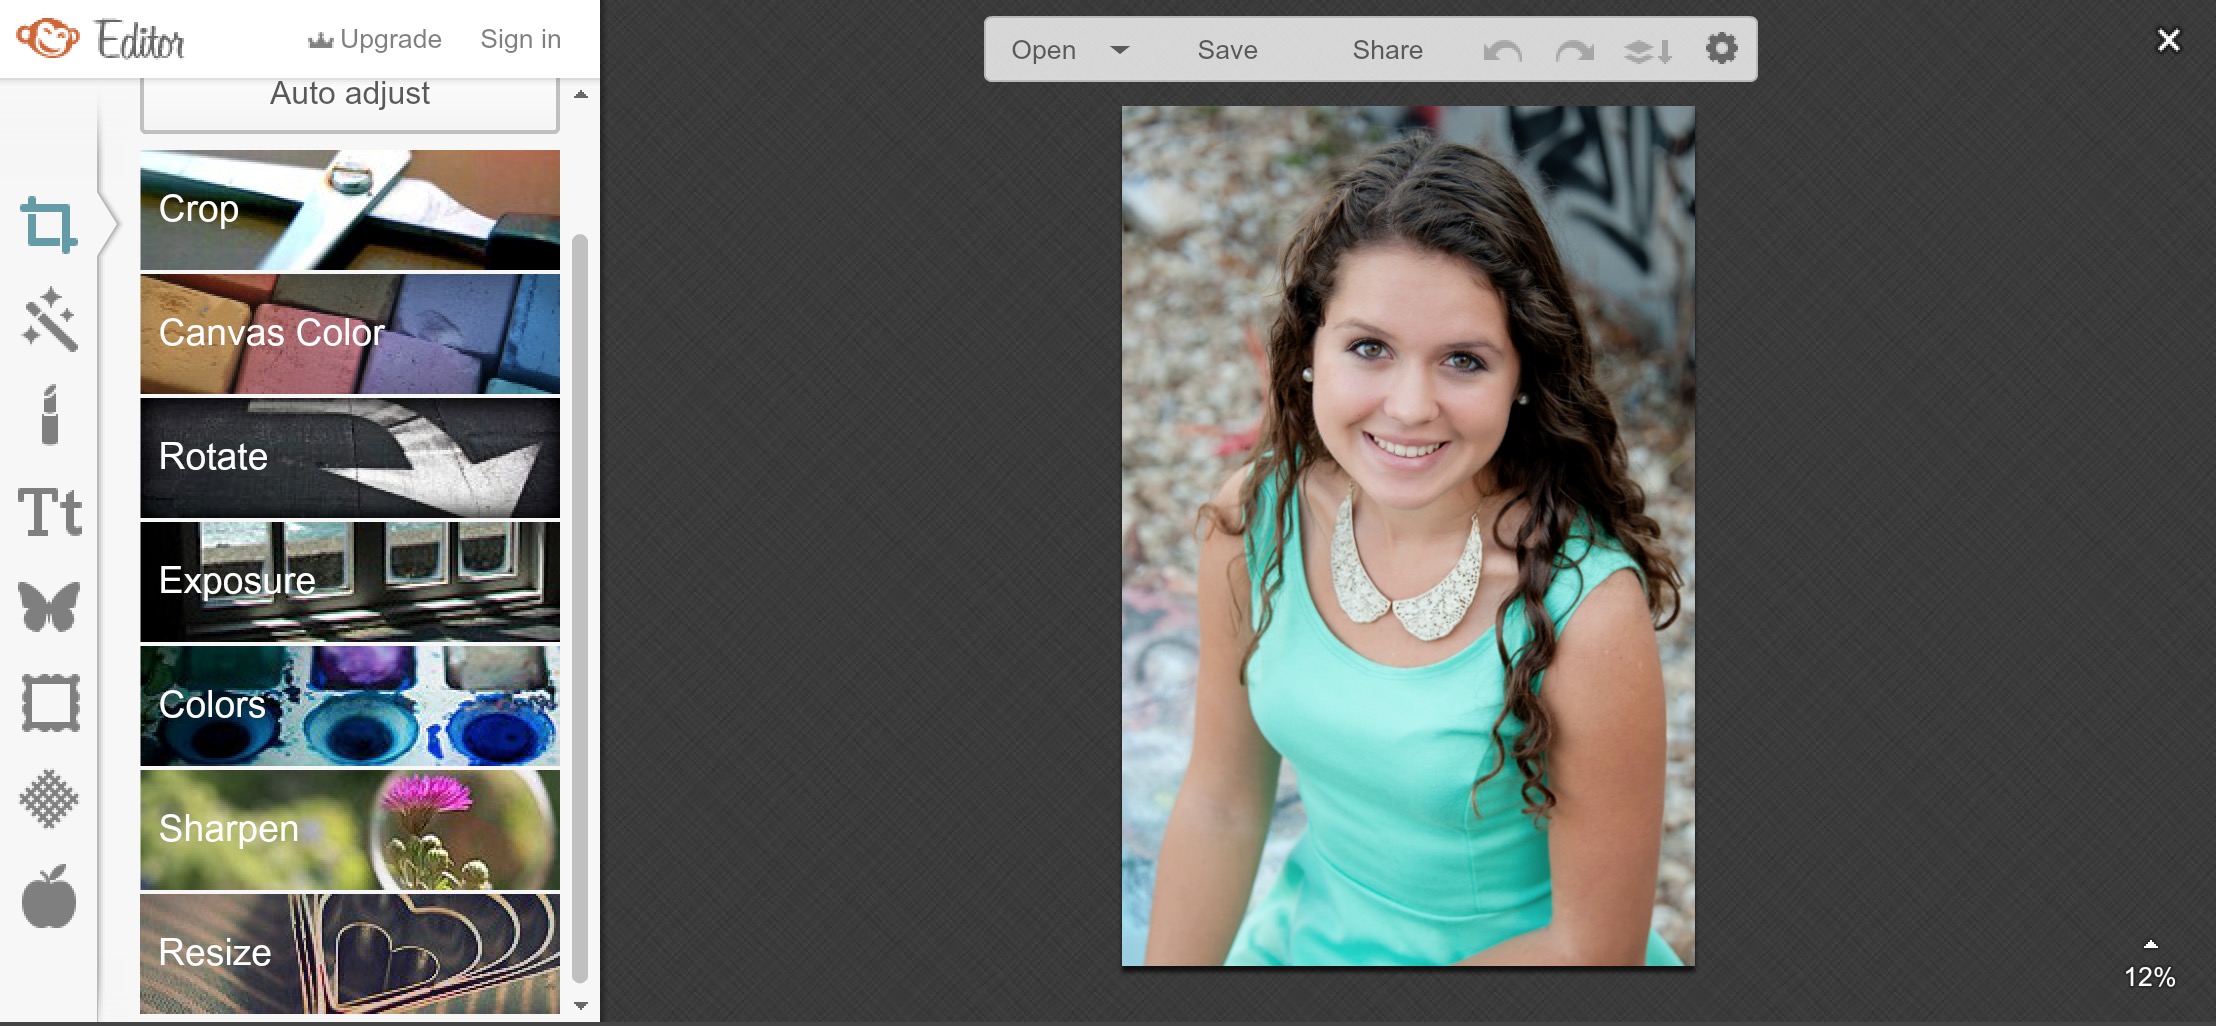
PicMonkey is my go-to website for photo-editing, designs with transparent backgrounds, and any quick edits I need to make. It’s extremely easy to use, and it comes with a lot of pre-made add-ons like filters, frames, and graphics. Here’s a basic summary of its features:

  • A text feature that allows you to use your own fonts
  • An “overlay” feature with tons of pre-made graphics, from trees and flowers to banners and flourishes
  • The ability to use a transparent background, which isn’t available on a lot of free websites!
  • Basic editing features like cropping, exposure, rotation, and resizing.

For my visual readers, this is what the format looks like:

PicMonkey Format

There are extra features available to those who upgrade, but I’ve never found a need to make that jump. It’s only $4.99 though, so if you do find some features you want to unlock (like more filters and overlays), it’s not too much of an investment!

Canva

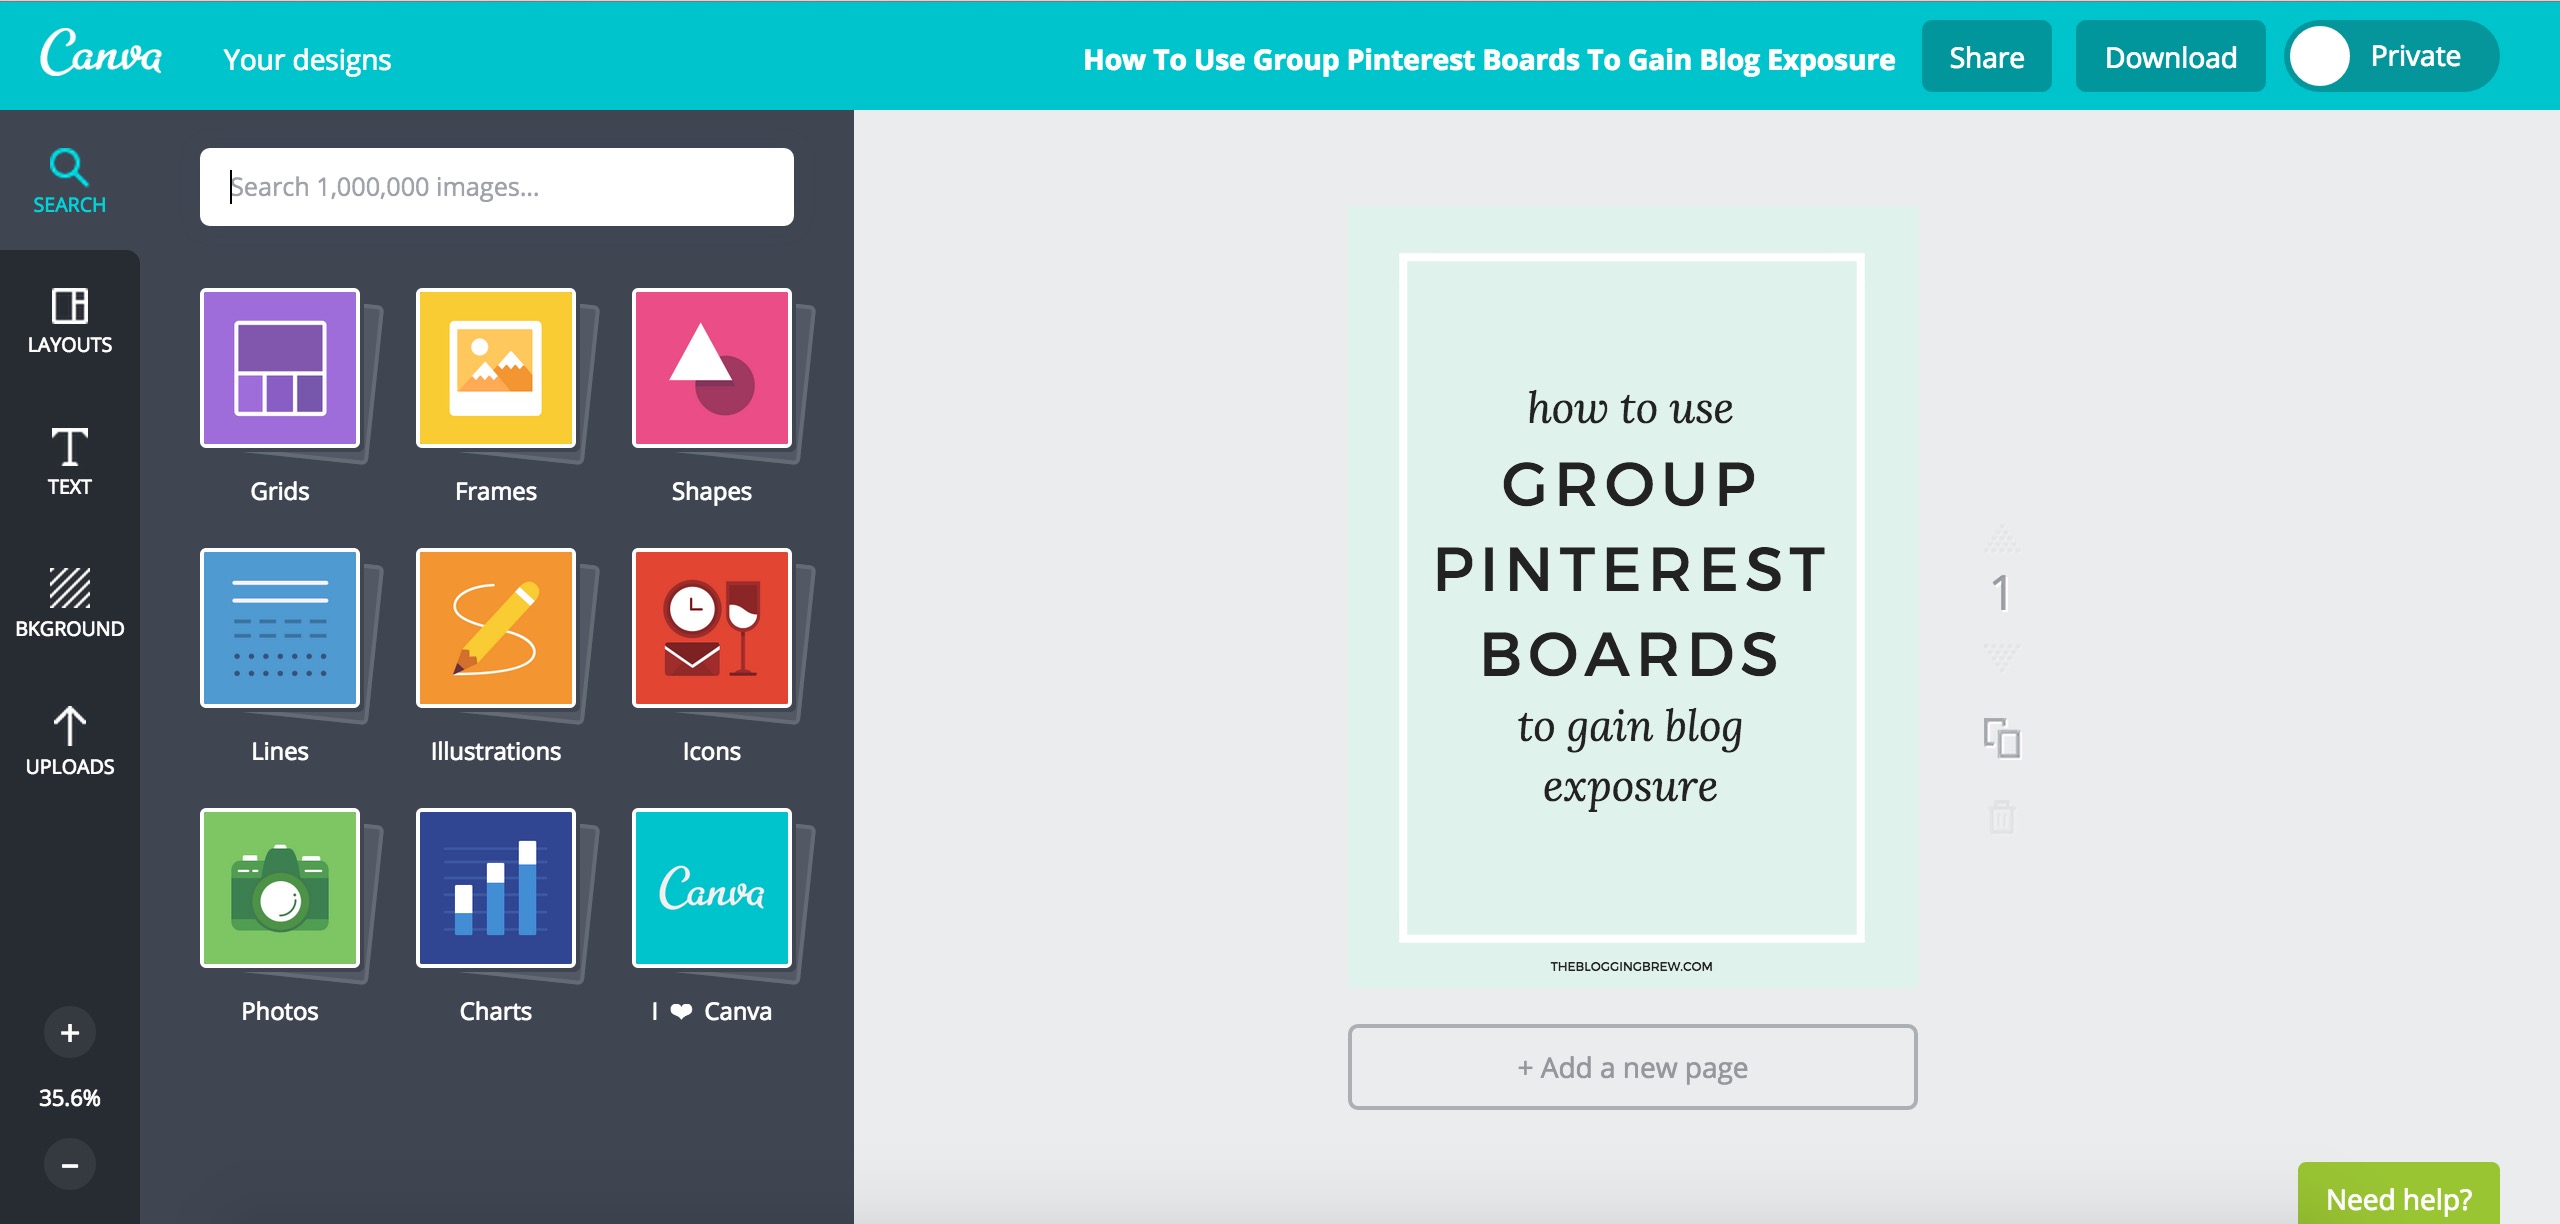
Canva is what I use to create most of my graphics, including the one I made for this post. This website is more suited for graphics that don’t involve photos, although it still has a few features for them! There are hundreds of pre-made graphics, to the point that it’s nearly impossible you won’t find the shape or line you’re looking for. Canva also saves all of your graphics into a simple feed, so you can always go back and edit one or copy it for use as a template. Here are some other useful features:

  • A snap-to-grid feature, perfect for centering your work
  • Pre-made graphs and charts for use in infographics
  • A grids feature with tons of collage layouts
  • Textured/patterned backgrounds, like the one in my graphic above
  • Dimensions for different uses, like Facebook cover photos or Pinterest graphics

The layout is simple and ad-free, which is always great!

Canva Format

Canva also has a great blog, called Design School, where they provide tips for using their website and creating beautiful graphics. Definitely a bonus!

Why Do I Use Two Websites?

While Photoshop has just about every feature you could need built into one package, that’s not the case for most free websites. PicMonkey and Canva are both great websites, but neither of them do everything I need. Fortunately, when combined, they have most of the features I’m looking for, and switching between them isn’t a horrible inconvenience. For example, PicMonkey allows me to use my own fonts and transparent backgrounds, while Canva has a snap-to-grid feature and more pre-made graphics. “Two is better than one” just holds true for this scenario!

What graphics program do you primarily use for your blog? How is it working out for you?

How To Use Group Pinterest Boards To Gain Blog Exposure

Pinterest has done great things for my blog since its start back in March 2014. It’s consistently held the top referral spot for my blog (over 75% of my views are referred through Pinterest!), and it’s where I discover new blogs to follow. Only recently did I venture into the world of group Pinterest boards, and boy was I missing out!

Group Pinterest boards are just like any other Pinterest board, but they’re pinned to by more than one person rather than just the creator. This is great for several reasons:

  • More contributors means more content, and more content means more activity.
  • A large group of contributors can also bring in a bigger following.
  • By having a diverse group of pinners, your pins will be exposed to people who don’t follow you yet.
  • Group boards often have rules that require members to repin other pins within the board after pinning something of their own, so you’re guaranteed some repins!
  • If your blog graphics have a consistent style to them, the members/followers of the group board will start to differentiate between your pins and the pins of other members.

Becoming a member of a group Pinterest board can be a great way to gain exposure for your blog, and it only takes a little bit of strategizing to start noticing improvements.

Finding A Group Pinterest Board

Of course, the first step to using a group board is finding one! There are several websites that aggregate group boards in one giant list, like PinGroupie, although these types of sites can leave you searching for hours to find a good board. You can also search for a specific topic in the Pinterest search bar, and then filter your results for “boards”. If none of these options lead you to a board you like, try checking out the boards of people you follow—I’ve found some great boards this way! You can also join my group board, Blogging Is Our Jam, where members and I pin all things blogging!

Related: Blogging Is Our Jam Group Pinterest Board

There are a few things you should consider when choosing a group board to ensure you’ll benefit from it:

  • Are the members active? Is there new content being pinned every day?
  • How many repins does each pin on the board have on average? Are there a lot of pins without any repins? This could be a bad sign!
  • Do you content that would interest the average follower of this board?
  • Are the pins on this board of good quality? Would you repin these pins?
  • Is there a lot of spam in this board? Do members pin things unrelated to the board’s topic?
  • How strict are the rules for this board? Is there a daily pin limit?

Once you’ve found the board for you, just follow the instructions provided by the creator in the board description. No instructions? Try commenting on one of the pins asking to become a member—this doesn’t always work, but it may be your only option!

Start Pinning!

After creating some great graphics for your posts, slowly start pinning them to the new board. I say slowly because you don’t want to seem spammy, and some boards may have a limit as to how many pins you can add a day. I try to max out my pins to about 5 a day, with a couple of hours between each. This can also help you figure out when the best time to pin is!

Take note of your pins’ success

This is when the real strategizing comes in. Every time you add a pin, make note of it somewhere, and check back every once in a while to see how that pin is doing. What was the pin about? How many repins did it get? Any comments? This can help you learn a few things about your pins:

  • If you’ve pinned from a specific post multiple times, but with different graphics, you can see which graphic caught the most attention from its audience.
  • If your graphics are fairly consistent, a difference in the number of repins between different posts could show that your audience is interested in one topic more than the other. For example, if your pins that link to posts about blog growth are doing great, but the ones about social media aren’t, this could be a sign that your audience is more interested in learning about blog growth than social media. Use this kind of data to come up with new post topics that you know your audience will enjoy!
  • Similarly to testing graphic styles, you can also test out post titles by creating graphics for the same post, but with different text, to see which ones grab the most attention. For example, the graphic I created for this post says, “How To Use Group Pinterest Boards To Gain Blog Exposure,” which is also the title of this post. However, I could’ve shortened it to something like, “Using Group Pinterest Boards To Grow Your Blog”. The takeaway here is that the text in your pin doesn’t have to match the title of your post—use whatever attracts more traffic!

Repin Other Members’ Content

More of a courtesy than anything else, repinning content from other members will ensure you keep a good reputation among the board members and don’t make any enemies. Don’t be that person who just takes advantage of the board—the only way group boards work is if everyone contributes by both pinning and repinning. Besides, there’s probably some great content to repin!

I don’t think I’ve said the word “repin” so many times before.

Are you a member of any group boards? I’d love recommendations!

How To Find Your Blogging Niche

So you’ve decided on a blogging platform and found a beautiful design to showcase your content. All the behind-the-scenes work is done, but one of the biggest questions every blogger asks themselves is leaving you feeling stuck:

“What am I going to blog about?”

I started this How To Start A Blog series with the intention of helping new bloggers bypass the struggles I dealt with just over a year ago. While I was pretty confident on the techy side of things, big decisions like deciding what to blog about and choosing a domain name were always tough for me. I would spend weeks just waiting for the right idea to come to me, and spent even longer putting off the launch of my blog because I wasn’t sure if I was making the right choice. I feel like I’ve finally found my blogging niche, but there are so many tips I wish I’d known about from the start.

As anyone who’s been following me for a while knows, I love writing about my blogging experiences and sharing the knowledge I’ve gained in blogging, business, and design. I find such joy in helping other bloggers and seeing their excitement when they reach one of their goals or relate to one of my posts. In no way am I a blogging expert (yet), but I spend every day learning new things and building up my skill set in order to provide The Blogging Brew readers with content that will help them create the blog of their dreams. I’ve been amazed at the growth of this blog over the past few months, and I’m confident I’ve found my calling.

Why did I just share that story? Because that’s what finding your niche feels like. It gets you excited, and gives you a sense of fullness and belonging that I want all of my readers to feel. Finding your niche not only defines where your blog will go, but ensures you will enjoy blogging longer than just a few months. I hope this post will help you find that calling and set you and your blog on a track for success!

One of the biggest mistakes I made when deciding on my blogging niche was expecting it to just come to me. Staring at a wall waiting for an idea to pop into your mind is not the best way to go at this, trust me. Grab a sheet of paper and pencil, and prepare to do some writing, because this is big stuff!

Define Your Interests

You want your topic to be something you’re passionate about, so figuring out what your interests are is the first step to this process. Jot down a few of your favorite topics, even if you don’t think you could blog about them. Do you like cooking? Talking about your faith? Finding new tips for college life? Include your hobbies and anything you do when there’s a moment to spare—those moments really define who you are and what you love.

Look For Inspiration

If you have a list of favorite bloggers or online presences, now is the time to figure out what exactly you like about them so much. Look through their posts and write down which ones you enjoyed, or which ones you think you could rewrite with your own take on the topic. This isn’t supposed to encourage you to copy another blogger, but seeing someone talk about a topic you enjoy may get those ideas flowing!

Identify Your Strengths

Blogging about something you’re informed about can be extremely beneficial, especially if it’s a topic that not many people are proficient in. Of course, this is not a requirement by any means, and I definitely didn’t fit into that category. My main topics are blogging and design, and I can guarantee you that a year ago, I knew close to nothing about these topics. I did know that they were topics I wanted to learn more about though, and blogging about them has forced me to keep learning every day in order to put the best out for my readers. Write down the strengths you possess, but include any topics you would love to learn about as well.

Consider The Unconventional

Now is when you get to be creative! One big thing to consider when coming up with your blogging niche is the audience you’re trying to attract. You want to solve a problem those readers are facing, and being original will help you stand out. There are tons of copycat bloggers out there, and while you may think that following the exact path of a successful blogger will bring you equivalent success, you’ll only end up being shadowed by the original blogger and potentially losing readership when your followers realize what you’re doing. Besides, being original is fun! It gives you the opportunity to create something that helps people, and you’ll establish yourself as a professional in that field.

Narrow Down Your Focus

Ask yourself these questions and try to create a finalized list of your favorite topics:

  • What motivated you to start a blog?
  • What do you enjoy about the blogs you read? What keeps you going back?
  • What’s missing in the blog you read? How can you fill that hole?
  • How can your blog help other people?
  • What topics can you come up with the most post ideas for?

Choose The Winning Topic

Hopefully you have a list of 3 or 4 topics now that you would enjoy writing about. There really isn’t a “rule” as to how many topics you’re allowed to blog about, but making that list as small as possible will really help you define your niche and audience. Ask yourself these final questions about each topic to determine which one(s) will be the best for you:

  • How many other people are blogging about this topic? Is the niche saturated?
  • Is this topic solving a problem? Would readers find a benefit in reading your blog?
  • Can you see yourself writing about this topic once a week? Twice, three times?
  • Are you passionate about this topic?

Your blogging niche will truly define the future and success of your blog, so spend a decent amount of time on this decision! If you aren’t confident about your choice, don’t feel pressured to just stick with it and hope for the best. Search for more inspiration, and eventually, you’ll know what the right niche is for you. I’d love to hear about your decision and see where your niche takes you!