The post How To Earn Money Using ShopStyle Affiliate Links appeared first on The Blogging Brew.
]]>Let me tell y’all a minor success story real quick. A few months ago, I was making less than $5 a month from all of my affiliate links combined. This month, I received over $100 from a single affiliate program. A hundred dollars might sound like a small monthly paycheck, but it’s kind of exciting to know I can expect a decent amount of money with just a little bit of work!
That money didn’t start coming in out of nowhere though. I discovered ShopStyle Collective last year when I decided to follow a ton of fashion bloggers (we all have those moments, right?  ). I thought, if they can earn all this money from posting links, why would it not work for me too? So I started adding a bunch of links to my posts, expecting a huge rush of money to come in.
Ha, I should’ve known that wouldn’t happen.
I earned maybe a few cents a day for several months. Then a few weeks ago when I became more serious about monetizing my blog, I came up with a plan to use my ShopStyle links more strategically, and like magic, the money started rolling in. Now that I feel like I’ve got a grip on things, I want to share those strategies with you!
First off, what are affiliate links?
A ton of companies offer affiliate programs that just about anyone can sign up for. When you sign up (affiliate pages are usually found at the bottom of a website), you’re given a special link with a tracking code so the company knows you’re the one referring customers to their site. When someone clicks on your link, you’re usually given a commission in the form of money or other rewards.
Some sites only offer commission when the person who clicked on the link purchases a product from the retailer, but others (like ShopStyle Collective) offer a commission every time someone clicks on your link! 
What is ShopStyle Collective?
Shopstyle is a shopping search engine that compiles products from hundreds of brands into one website. Their affiliate program, ShopStyle Collective, allows bloggers and other influencers to create links and widgets of those products to share them with their followers. You’ll get paid every time someone clicks on those links, so it’s a quick and easy way to start earning money if implemented right!
If you’re not a fashion blogger, don’t be turned away by the idea of a shopping website yet! I’m in no way a fashion blogger myself, but have still found success in using this program. I’ll show you some strategies for a broad variety of blog niches as well!
How To Start Earning Money With ShopStyle Affiliate Links
1. Create your account and start exploring
First things first, create your ShopStyle Collective account and get acclimated to their interface. You can also visit the regular ShopStyle page and use the navigation bar to search for all sorts of products.
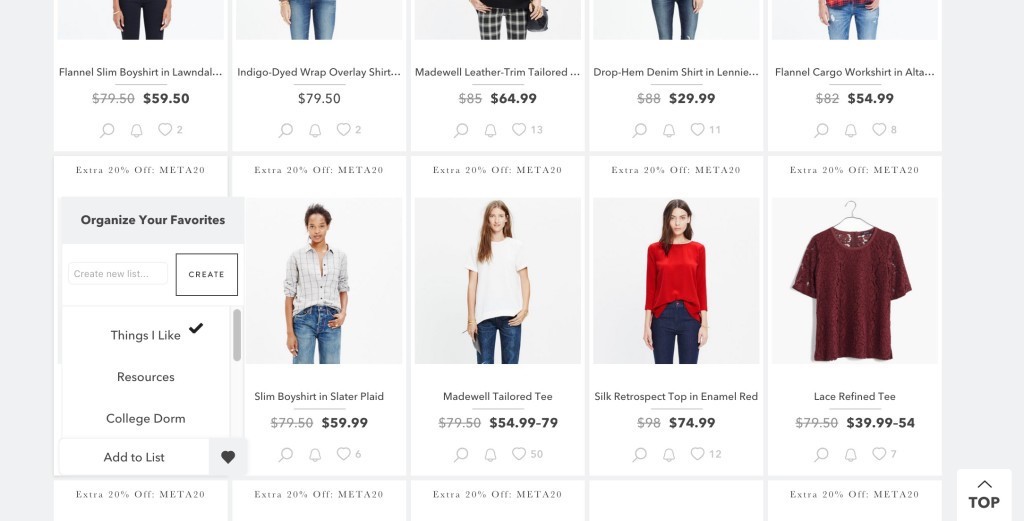
Creating lists
Lists are helpful for grouping together products of a specific category. You can create a list and add a product to it by clicking the heart below a products picture:
Creating links
To make a link, head to your ShopStyle Collective dashboard and select Search in the sidebar. From there, find the product you want to make a link for by either searching for it or choosing it from one of your lists. Hover over it and select Copy Link:
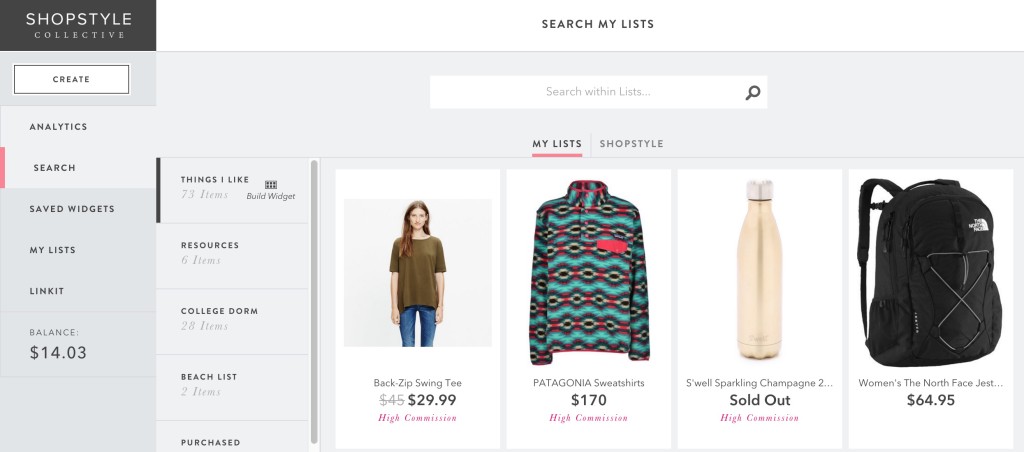
You could also use the Create button in the sidebar, but I like this route better because you can easily pick a product out of lists you’ve created!
Creating widgets
Widgets are a powerful tool that allow you to display multiple products at once anywhere on your blog, along with information about them like price and brand. Go to Create > Create Widget and select any items you want to include. Then click Build in the top right corner and set the dimensions. You can also choose what information you want to be displayed on the widget, although I always select the “show info on hover” option!

Finally, name your widget and select Publish. You’ll be given a chunk of code that you can copy and paste anywhere on your site, like inside your posts. Here’s an example of what that looks like:
2. Define your audience and goals
My initial mistake was that I didn’t think about who would be clicking on my links—I just started putting them everywhere. Figuring out who your audience is will narrow down the kinds of links you should be posting, as well as the types of posts you should be writing.
If your audience is just “college-aged girls”, then you’ll want to be searching for trendy clothes and accessories that a wide variety of people would consider wearing. By narrowing down your audience to, say, preppy 20-somethings that have a large spending budget, you can choose more specific items that relate to your audience better. These links will generate more clicks because a larger portion of your audience will be interested in the items your promoting.
3. Write posts that create a reason for readers to click your links
The trick to successfully using affiliate links isn’t placing links and widgets wherever you see fit and expecting people to click them. Instead, you want to write posts that direct attention to those links and create a reason for your audience to click on them. Here are a few post options that I’ve seen work the best:
Tutorials
Being able to teach someone how to do something is a powerful tool in the blogging world, especially when it comes to affiliate marketing. If you can convince someone that they can accomplish something useful by using the product you’re advertising, they’re a lot more likely to click on your links.
Tutorial posts also do well in search engines, because they’re filled with keywords and phrases that match up with popular “how to…” searches. When a reader types your product’s name, you want your post to be popping up on that first page. To do that, you need to write a great tutorial solves a real problem while still relating to the product you’re trying to advertise!
Here are some examples of tutorials you might write that revolve around possible ShopStyle links:
- Teach someone how to accomplish a certain style/hairstyle/makeup look and share the products you used
- Show how you use a single product in a variety of ways
- Make a “how to pack for *some trip*” post and include all the products you would take
Lists
Easy to write but sometimes hard to fill up, lists are a simple way to pack a ton of links into one post. Make sure the list you’re creating is unique though, because a lot of fashion list posts are very saturated right now! For example, instead of making a “Fall Essentials” list, you could make a “Fall Essentials to Match With Short Boots”.
Widgets are your best friend for these kinds of posts. Instead of having to create a link for every single product you include, you can throw all of the products into a single widget that your readers can scroll through and see the picture/price in one place.
Here are some list ideas to get you going:
- Travel essentials for a specific trip
- Workout clothes for a yoga session
- Makeup products for a New Year’s look
- Professional bags for women on the go
Now that I’m writing all these down, I’m kind of wishing I was a fashion blogger! 
Outfits
Of course, this is one of the most popular uses of ShopStyle links. If you’re a fashion blogger, you’re bound to be posting about your outfit every once in a while (or all the time). ShopStyle links are a super easy way to connect your reader to each piece you’re wearing, along with makeup and alternative styles. Isabella from Yep, It’s Prep uses this strategy extremely well, and has found a ton of success with ShopStyle!
I’m no fashion expert, so I’m not going to come up with a list of outfits to post about (I wear leggings and a t-shirt almost every day), but here are some generic options that you can expand on:
- Date night out
- A specific holiday outfit
- Professional-wear for an interview
- Outfits for a travel destination
If you’re not a fashion blogger, you can still use ShopStyle links!
After seeing hundreds of outfit posts across Pinterest, I figured ShopStyle was exclusively for fashion bloggers. I was so surprised to find out that ShopStyle has tons of non-fashion products! In fact, my most successful post is my College Shopping List, where I listed out everything you might need for a dorm room and included a widget of my favorite dorm products. I found bedding sets, shower caddies, travel bags, kitchen products, and a ton of other cool items to include in the widget.
I recently added a widget to my Resources page where I included some of my favorite office supplies as well! Here are a few of the fun things I found:
4. Create a Favorites page
One of the easiest ways to add ShopStyle links to your blog is by creating a page that contains all of your favorite products. You can link to this page in your navigation bar so all of your readers know where to find products you recommend! I would create separate widgets for a variety of categories (tops, shoes, beauty products) and create a navigation system for your readers to click through and find what they want. This will also help you get more clicks, because readers don’t have to scroll through a single widget for very long to find something interesting!
5. Offer advice and become an active user on Tumblr
Remember how I said I got really into following fashion bloggers last year? Well, I wasn’t following their blogs (kind of). I was following their Tumblrs. A lot of bloggers don’t even consider making a Tumblr because they feel like they’re creating an entirely new blog. That’s totally not the case though! Creating a Tumblr is a great way to expand your blog and social reach, and it’s also where I’ve found extremely successful ShopStyle users.
One of the best features on Tumblr is that other people can ask you questions that you can publish as posts, which will show up in all of your followers feeds. The power of this is that if you establish yourself as an expert in fashion, people will start asking you for advice. I see a ton of “what outfit would you wear for *insert situation*” questions, and the user can simply respond with ShopStyle links! Of course, you won’t become Tumblr famous right away, so here are some other suggestions for using Tumblr:
- Include an excerpt of your blog post in a Tumblr post, and link over to your original post
- Offer daily advice to start garnering trust and interest from other Tumblr users
- Post pictures of your outfits and include ShopStyle links in the caption
- Ask other Tumblr users questions to get your name out there
I haven’t gotten anywhere near expert status on Tumblr, but just by including in my bio that I’m a blogger who offers blogging advice, I’ve received several questions from users wondering how to start their own blog. You can find my Tumblr here to see what it’s all about!
Now that you have the strategies, it’s time to start implementing them! You might not see success right away, but once your posts start making their way around social media, you should see an increase in clicks and earnings. Note that you won’t be paid until you get $100 in earnings, which will probably take a while the first time around, but after that you could be hitting the mark each month!
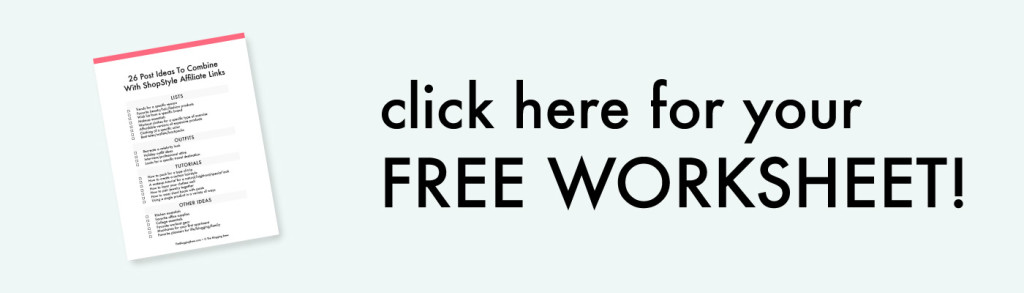
To get you started, I’ve compiled a list of over twenty post ideas that you can incorporate ShopStyle links into. You can grab your worksheet by signing up here or filling out your info in the widget below! ☺️
P.s. if you’re looking for other helpful blogging tools, I’ve put together a resource page with all of my favorites. My new obsession? BoardBooster, a Pinterest scheduling tool that’s completely changed the way I pin for only $5 a month.
Have you used ShopStyle affiliate links before? What are your strategies for success?
The post How To Earn Money Using ShopStyle Affiliate Links appeared first on The Blogging Brew.
]]>The post Investments Worth Making For Your Blog appeared first on The Blogging Brew.
]]>Investing in your blog sounds like a major commitment. It’s like the big jump between hobby blogging, and professional blogging. You might have already invested some money into your blog, whether through buying ads on other blogs or boosting your design a bit, but what else is there? What else could possibly be worth more of your money?
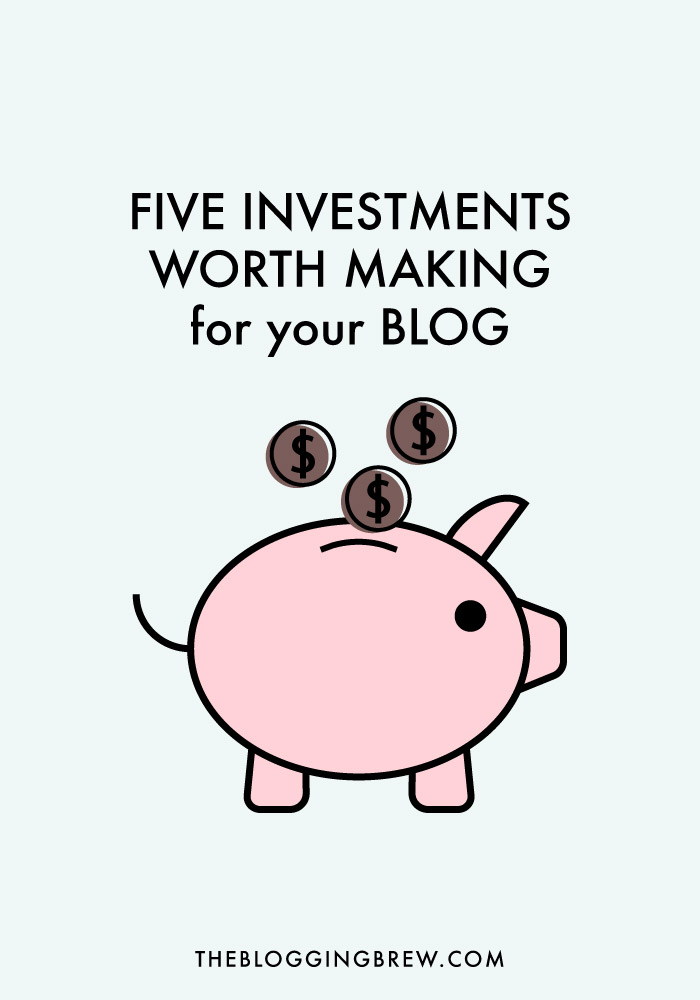
As a college student, I am by no means in a place to be throwing a ton of money into my blog, even if I reallyreallyreally want that super fancy Pinterest scheduler that everyone keeps raving about. I think that’s a big reason people spend money on their blog; they see other bloggers investing in something, and feel like if they don’t follow along, they’ll be a “lesser than” blog. Well that’s totally and completely not true! I’ve done my best to find every way to save money, while still presenting what I think to be a pretty dang awesome blog. However, there are a few investments that I believe are worth making, but fortunately, not all of these even cost money! Just a bit of your time and effort if you’re ready to take that step.
1. A Custom Domain
This was one of the first investments I made in my blog, and oh my gosh does it make a difference. Having a custom domain immediately presents a sense of professionalism (not that subdomain blogs can’t be professional, it’s really just the look!). It also ties together the branding of a blog, and prevents another blog from copying your name as easily. That said, if you’re using a .blogspot or other free hosting blog, check to make sure someone doesn’t already have a blog with your name as a custom domain, because if you ever decide to make this investment, you’ll be forced to change the name you’ve spent so long growing! I’d say if you’re looking to make only a small investment in your blog, this would be the one to make. I bought my first domain through GoDaddy, but I’ve since decided to drop them and purchase my domain directly through my hosting service, which is my next topic!
2. A Self-Hosted Blog
Choosing to switch to a self-hosted blog can be a surprisingly emotional, stressful, and exciting process. You can’t just decide to do it, and 5 minutes later have one. Boy do I wish. It’s a long and strenuous process, but it is absolutely worth it. I ran my blog through Blogger for almost a year, and I never had any issues, so this isn’t something you should feel pressured to do unless you know you want to grow your blog immensely. I knew that I wanted to keep this blog going for a long time, and I also wanted ownership of my content, so switching to self-hosted WordPress was the perfect choice for me. I’m currently hosting my blog with Bluehost (my affiliate link) and love the friendly service!
Related: Choosing A Blogging Platform
3. A Beautiful, Unique Design
I say “beautiful” because there can be many interpretations of good design. Some people may say simple and clean, others may say personal and full of character. I do believe that it’s worth investing either some time or money in a beautiful design though, simply because it makes your blog stand out from the rest. Using a pre-made design is great for a while, but as you grow your blog’s brand, you should find a design that’s your own so readers know what blog they’re reading as soon as they visit. There are a few ways you can go at this, and because I’m cheap/don’t have a job/enjoy coding, I decided to teach myself how to design blogs and created this one on my own!
If coding isn’t your thing (don’t feel intimidated, you’ll make a designer’s day if this is you), look into hiring a designer to create something special and unique. This will require a bit of research, because depending on your price range, there may only be a few designers that work for you. If you choose to go this route, try not to be too cheap, because there is a lot of behind the scenes work that goes into designing a blog. It can be somewhat offensive to ask a designer to give you a discount or change up their packages just so you can save a few bucks, because you’re not paying a business, you’re paying a person just like you!
Related: Getting A Beautiful Blog Design
4. A Cohesive Brand
Similar to your blog design, having consistent branding will do wonders for your blog. This includes your logo, colors, graphics, social media, and pretty much everything people see that is connected to your blog. As you start to connect all of these together and promote your brand, readers will begin recognizing certain design aspects or names as being part of your blog, which is a huge accomplishment!
I always thought that the logo was the most important part of creating this cohesive brand, but I realized that the only place my logo really appears is on my blog itself. What my readers are repeatedly seeing is my graphics, which is why I’ve decided to invest more time in creating a consistent graphic style than invest money in a logo design. If you just can’t seem to come up with a great media template or logo design, lots of designers have a brand design packages that would be perfect for you!
5. Social Media Presence
Creating a name for yourself on social media can be a huge task. It takes a lot of time and effort to get people to recognize your name and face, but having that social media following will help your blog immensely! Now when I say social media following, I don’t mean having 5,000 followers that you got from a giveaway who don’t actually want to read your blog. While that number is great for showing to sponsor companies, it really won’t do much for promoting your blog. I would rather have 200 followers who read my blog on a weekly basis and enjoy my content than thousands who scroll past my posts!
Time is going to be your biggest investment here, but if you don’t have much of that, there are a few paid options that will help too, like pin/tweet schedulers that do all the posting work for you. If you choose this option, try to spend at least a few minutes a day on your social media accounts connecting with your followers and posting personal things, rather than just feeding them post promotions all day long! I’ve made a few posts about this topic, with tips for growing your blog with Twitter and tracking the presence you’ve created, as well as a group Pinterest board to help bloggers find new content to read and share!
What investments have you made in your blog? Are there any that you couldn’t live without?
The post Investments Worth Making For Your Blog appeared first on The Blogging Brew.
]]>